
LESSON 5
how to create your a new grassland place in inaturalist
If you can’t find an existing project to contribute to by (1) searching the iNaturalist website or (2) searching for projects near you with the iNaturalist mobile app (on Apple and Android devices), then you may need to consider creating your own. Please read iNaturalist’s recommendations on creating new projects. But before you create a new project, you have to define the place you will be documenting. Read on!
you need a place before you can create a project
Before creating a new project, you first need to define the place you are interested in documenting, which ideally is a grassland. This place can be of any size, from a small prairie remnant along a roadside bank to something much larger. First, do a quick check to see if your place already exists within iNaturalist’s place name database. Let’s pretend for a moment that you drive a certain section of interstate every day to work and one day in September you spotted what looks to be a prairie remnant along the south edge of the freeway. After securing permission from the Department of Transportation, you safely pull off to examine the site more closely and discover it is a diverse roadside prairie. In this example, if you want to create an iNaturalist project for this site you can almost bet that one doesn’t exist and since it is a roadside bank you can bet that no formal place name has ever been assigned to that specific site. If you want to establish an iNaturalist project for this prairie then first create a place.
Step. 1. On your desktop version of iNaturalist click “More”

Step 2. Now select “Places” from the drop-down menu

Step 3. Now click on “Add a New Place”

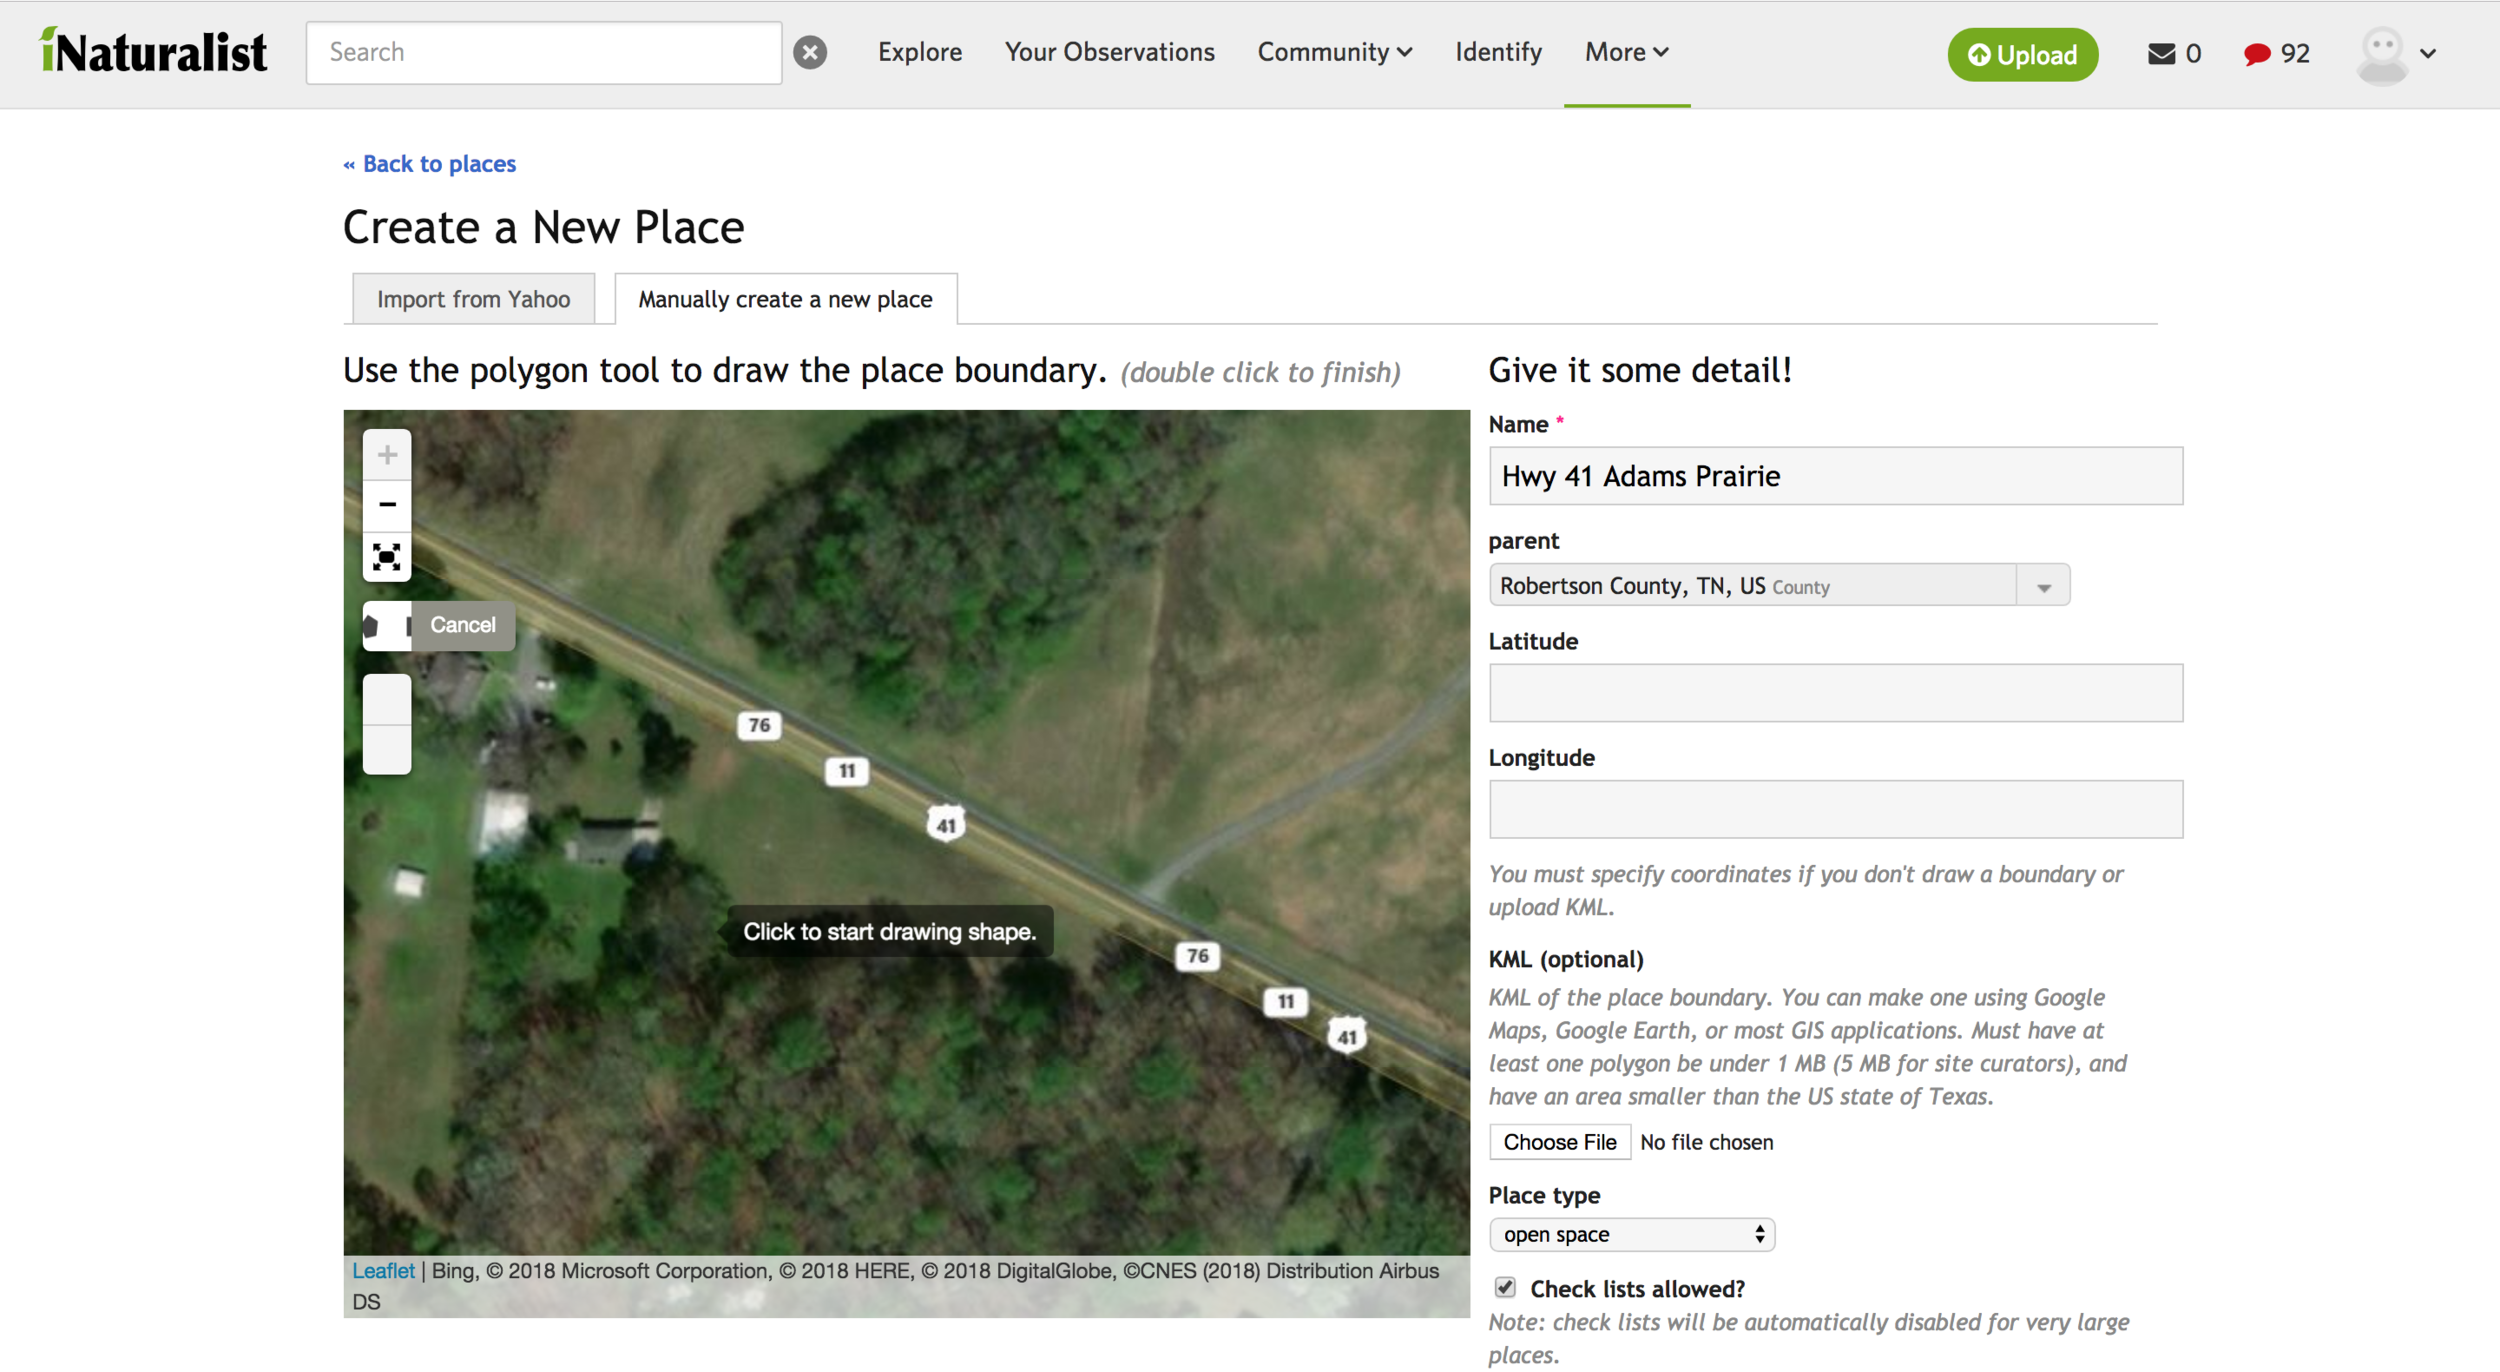
Step 4. Click the tab that reads “Manually create a new place”

Step 5. Now it’s time to give your new place some details:
Give it a name such as “Hwy 41 Adams Prairie”
Assign your place to a parent. For example, you can tell it what county to include it in, such as “Robertson County, TN, US
For “Place type” look at the drop-down list and select “open space”
Click the checkbox to enable “Check lists allowed?”

Step 6. Next you have to specify your project location.
You have two options.
Option 1 is that you can map your project area in GoogleEarth and save the file as a .kml file and upload it directly to iNaturalist.
Option 2 allows you to map your project area directly with iNat. Here, we describe how to do the second option. First click on the box in the upper left corner of the map that has the pentagon shape in it. This allows you to draw in the boundaries of your project area. Next zoom in on the map to find your project site. The example below shows a real roadside prairie remnant in Robertson Co., TN in the town of Adams.

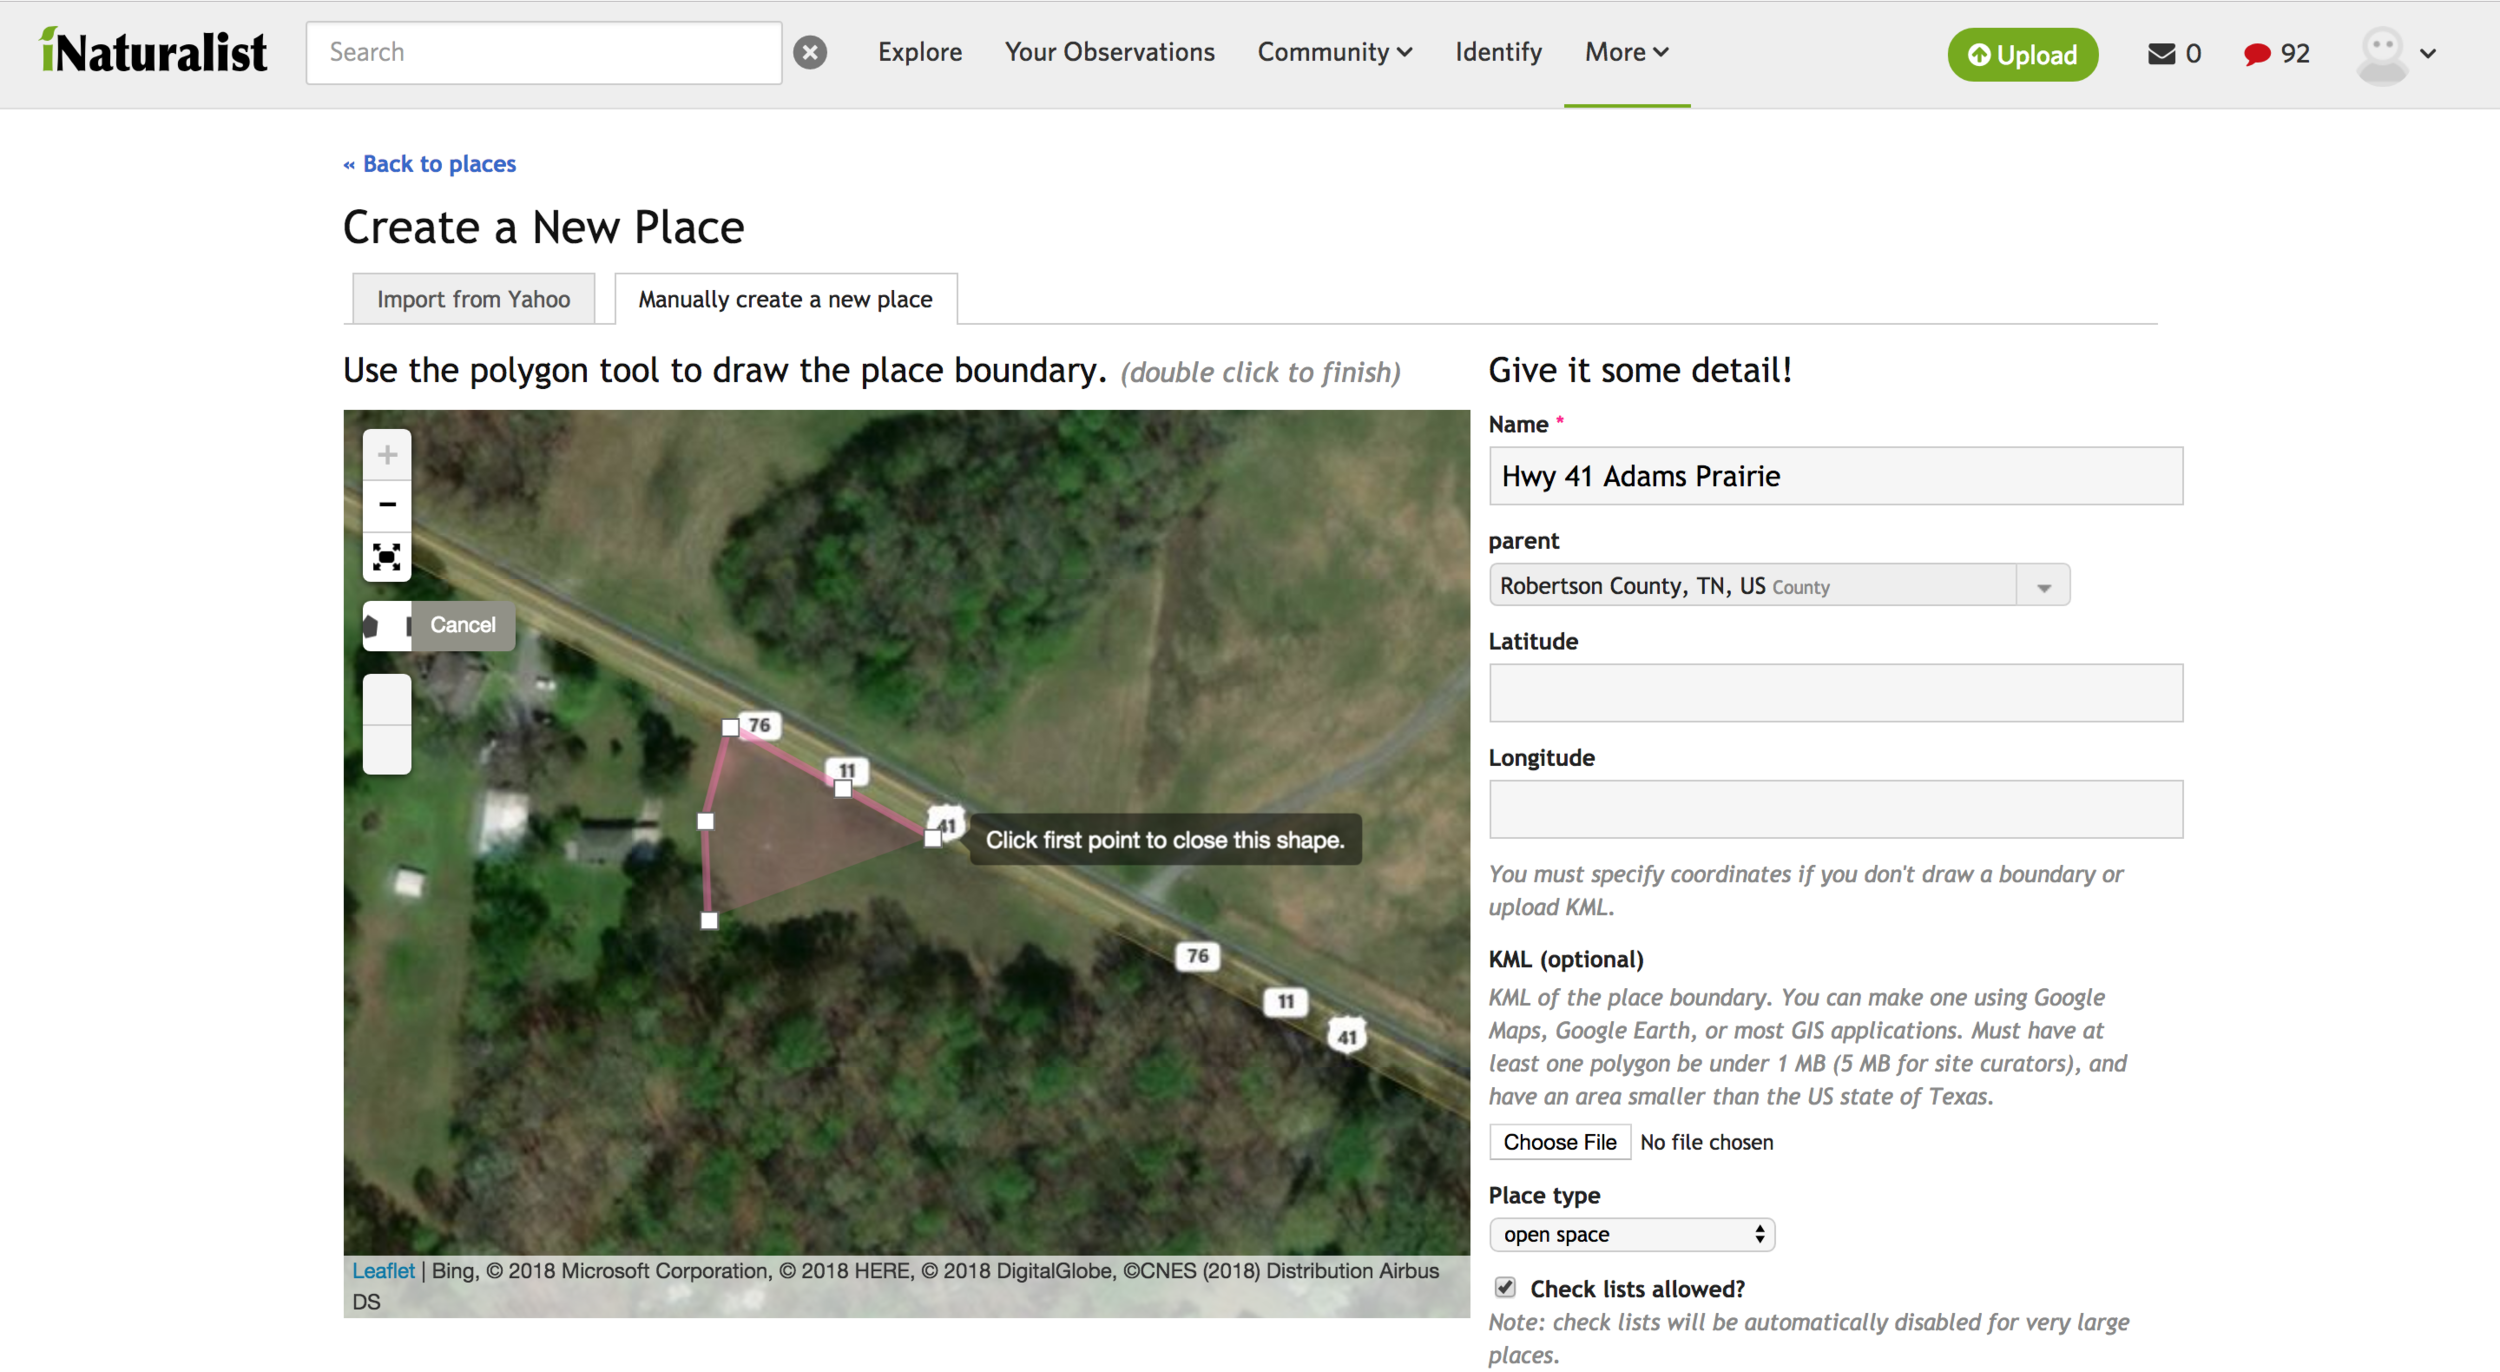
Step 7. Create a polygon on the map of your site.
Once you’ve zoomed in to your project area, now click the small box with the pentagon in it and you’ll be prompted to start drawing a polygon around your project boundary. Trace the boundaries of your site. It’s usually a good idea to give yourself a buffer. For example, if you are drawing the outside border of the field shown in the photo above, draw your line as to include the adjacent road bank and forest margin. This is because when you later return to the site to collect iNaturalist records your phone’s GPS may be slightly inaccurate. If you are near the edge of your site and your phone’s GPS is accurate only to the nearest 5 meters then you stand a good chance of having your observation not be mapped within your polygon. Map your project site a bit larger and you will improve your chances of including all observations made within your project site. When done drawing a line around your site, click the first point you made to close the polygon you’ve just drawn. This will complete your project area. You can always click on the same pentagon icon on the upper left if you need to edit your new project area polygon.


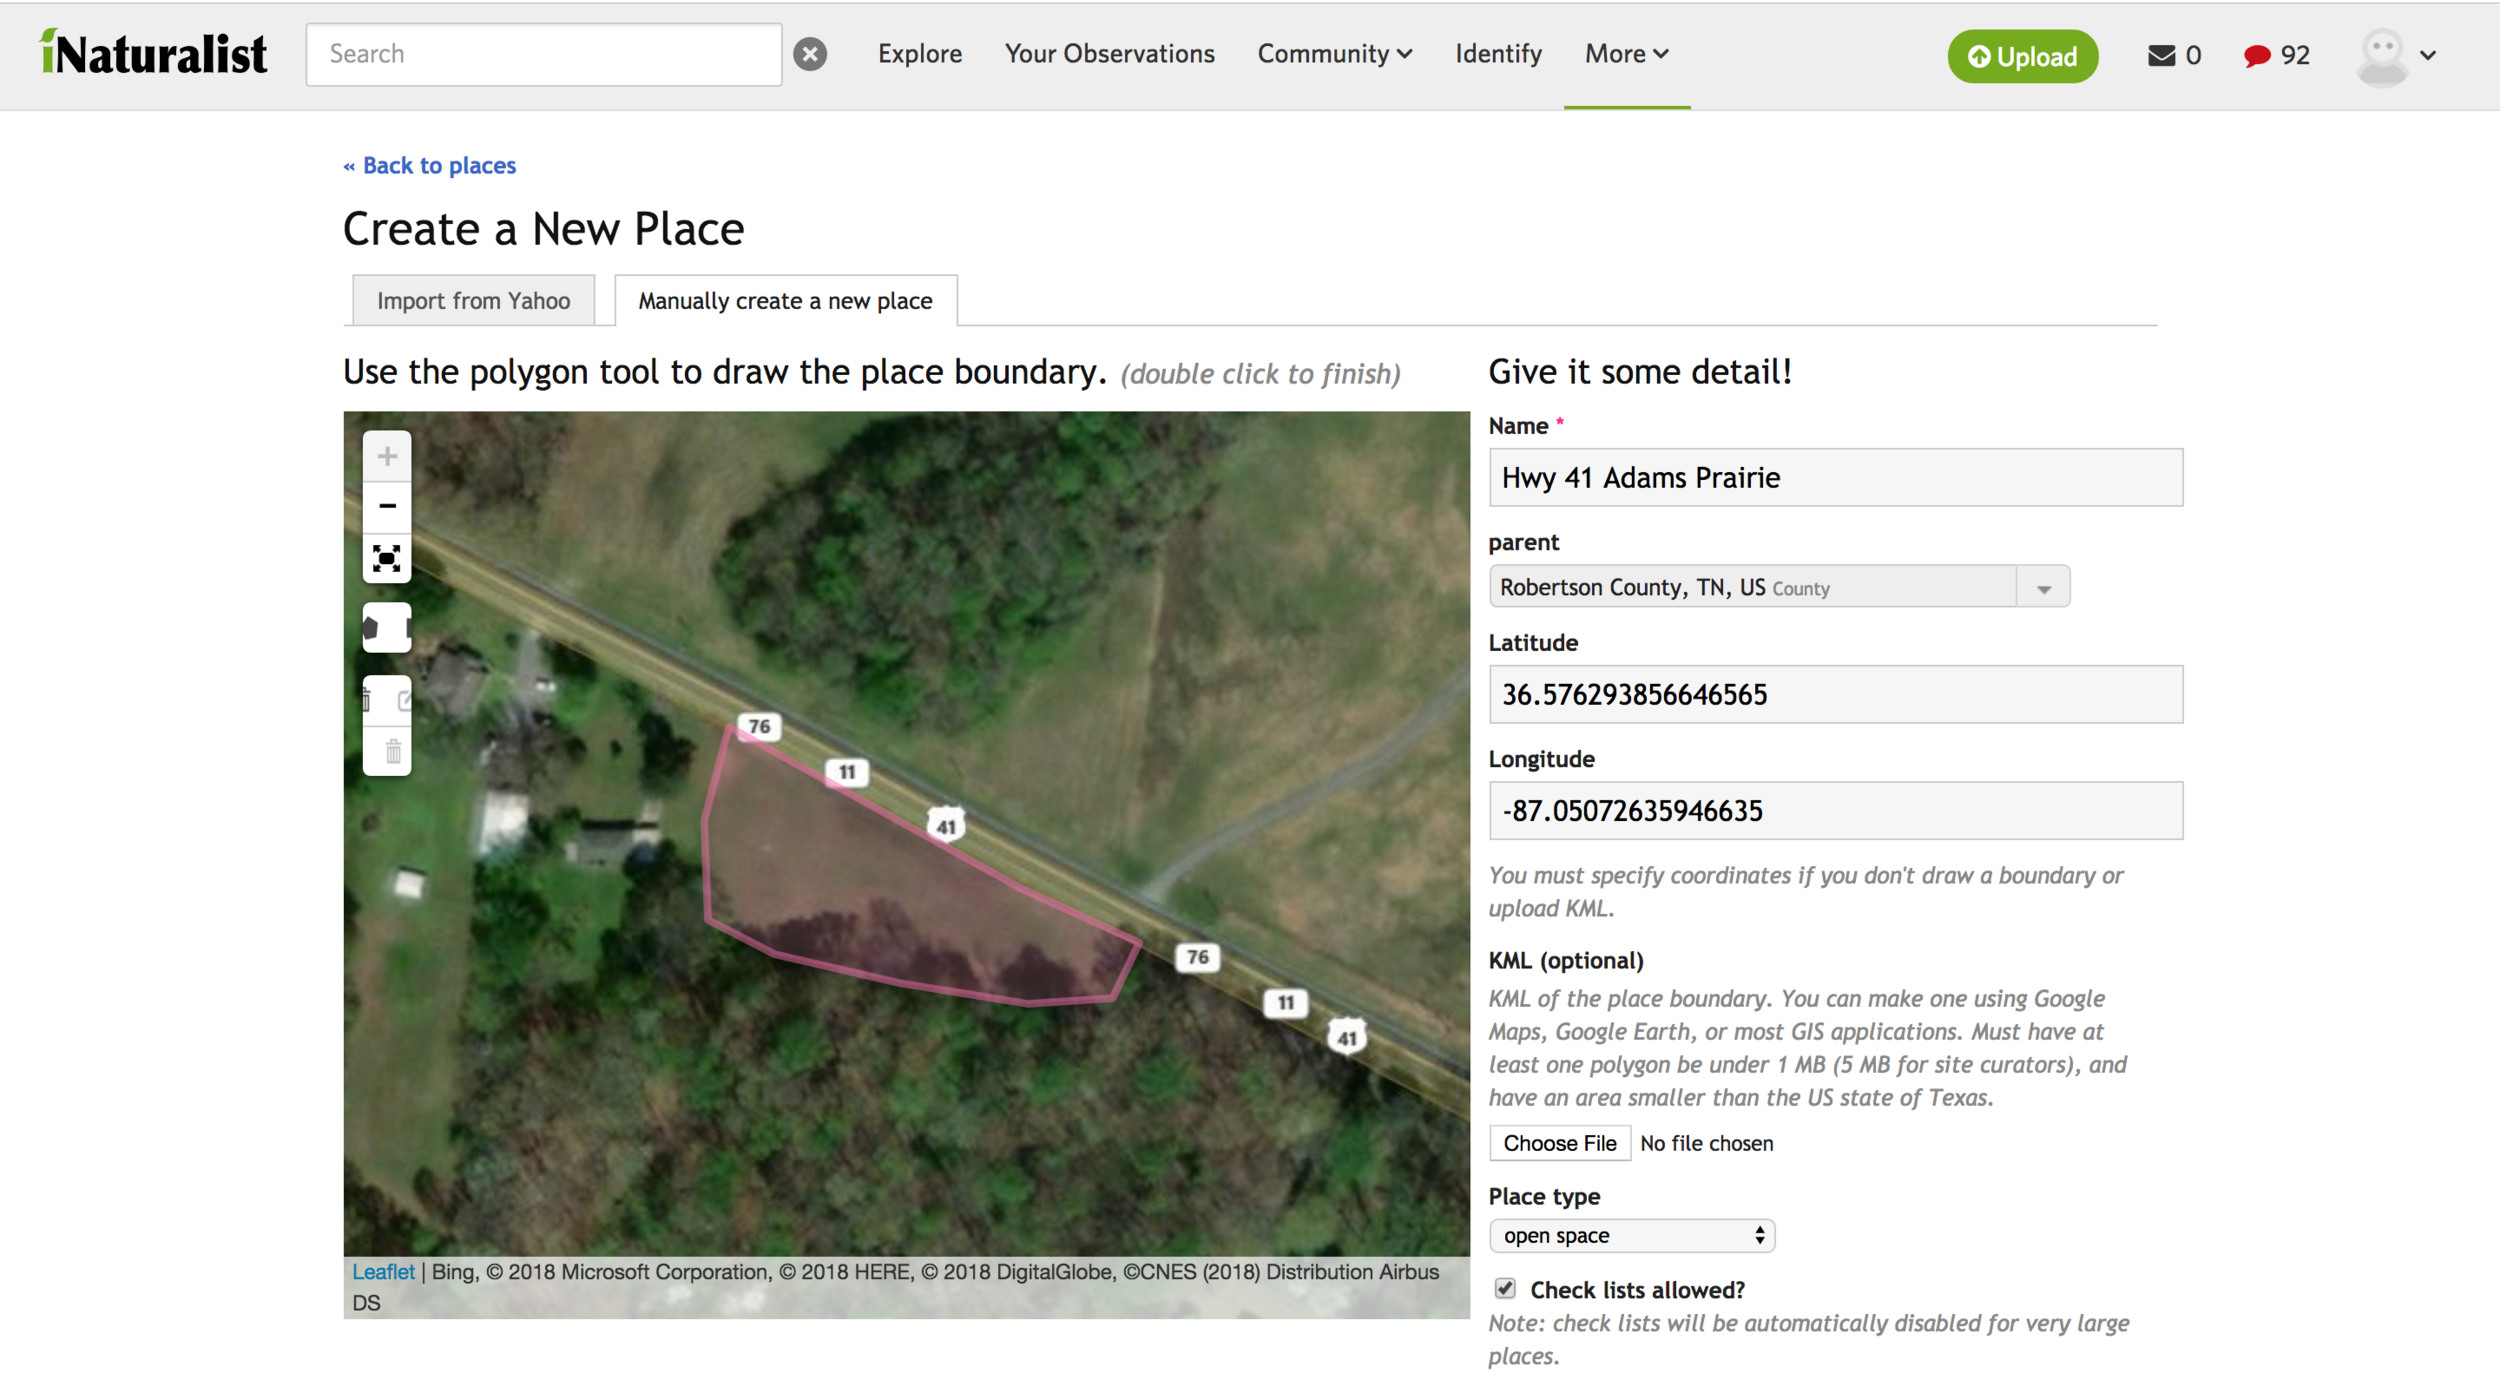
Step 8. Now you are ready to “Save place” by clicking the blue button at the bottom.

Step 9. Congratulations! You have just learned how to create a new place in iNaturalist.
This is what it should look like when you’re project has been successfully created and imported into iNaturalist. Now you are ready to create a project. Once you’ve created a project, you’ll need to link the new place and the new project together and you’ll be ready to start making observations for your new project.
