
LESSON 6
how to create your own grassland project in inaturalist
If you can’t find an existing project to contribute to by (1) searching the iNaturalist website or (2) searching for projects near you with the iNaturalist mobile app (on Apple and Android devices), then you may need to consider creating your own. Please read iNaturalist’s recommendations on creating new projects.
Step 1. Using the iNaturalist desktop version, on your iNaturalist homepage, click “Community” and select “Projects” from the dropdown menu.

Step. 2. Now click “Start a Project”

Step 3. Under “Collection Projects” select “Get Started”. See iNaturalist’s website for the distinction between a Collection Project and an Umbrella Project.

Step 4. Now you’re ready to start filling out the form for your new project.
Click here for iNaturalist’s guidance on how to fill out this form. The important part now is that you must link your newly created project to the new place you just created. See the red box below. This step is critical and yet it is not that intuitive.

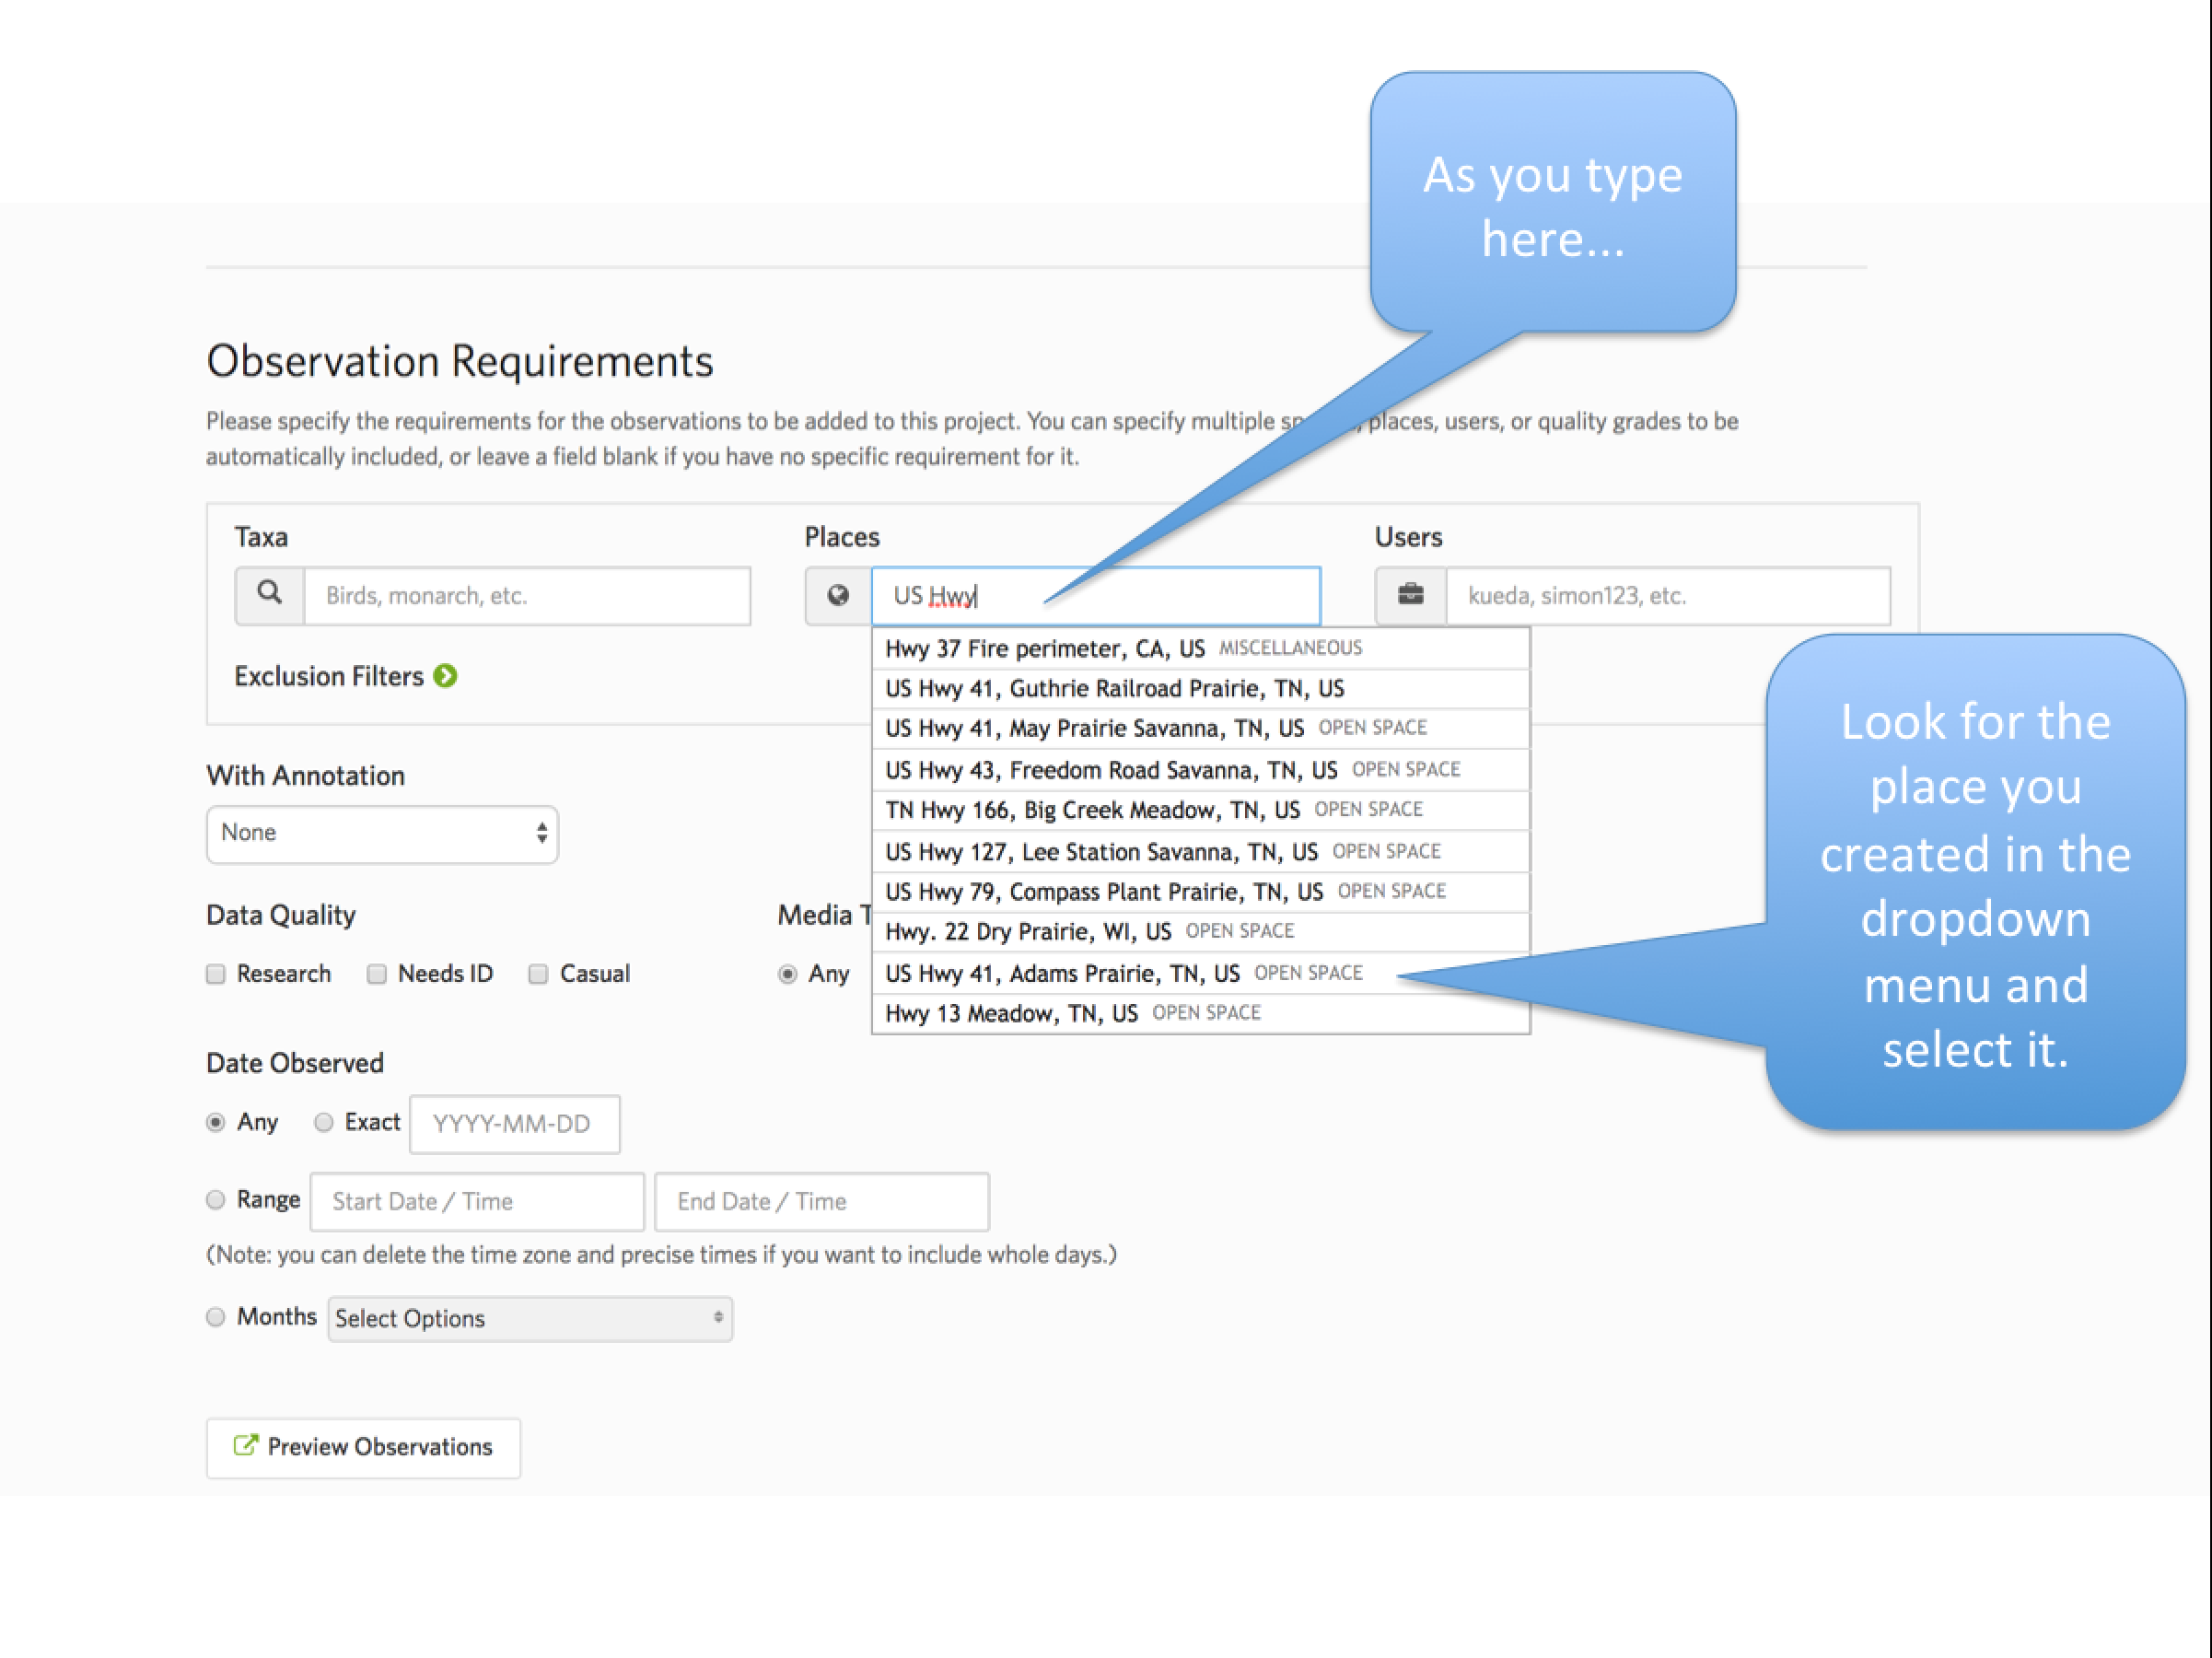
Here’s the “Places” box from a more zoomed-in perspective.

Step 5. In the “Places” box, start typing the new place that you created for your project.
As you begin typing, you will likely see a dropdown with a bunch of place names that iNaturalist is trying to match as you type. However, if you are careful and type your new place name verbatim then you should see your place name. Select it.
Step 6. Now you have linked your new “Place” and your new “Project”. At the bottom of the “Project Details” page click the green “Done” button.

Step 7. Now your completed project page will appear and should look something like this.
Consult iNaturalist’s help section for more information on customizing your project pages, such as how to add a banner photo, icons, change background color, and add text, or how to control who can post to your project.
