LESSON 9
Recording & Uploading Observations in iNaturalist
Once you've successfully found a grassland, then you are ready to begin documenting the site's biodiversity. Be sure your phone, iPad, or camera is fully charged and prepare to have fun!
TWO OPTIONS
Option 1: Use THE INATURALIST mobile app to TAKE PHOTOS & upload your observations DIRECTLY INTO THE MOBILE APP
First, you can use the iNaturalist App directly in the field. This requires that you have internet access. This works well in urban or suburban areas but does not work in some back-country areas. Using the App can be data-intensive so be aware but if you are doing only a few records in an area with WIFI reception then this may be the way to go.

Option 2: use your camera to take photos & upload them later via inaturalist website with your computer
Second, you have the option to use your phone’s camera and take pictures of everything and upload them at a later time with either the iNat App (via smart phone) or via the iNat website (via desktop computer). Using this approach is best if you intend to take a lot of photos in a short period of time or if you don’t have WIFI reception.
in the field…
With this approach, you can use your phone’s or tablet’s camera, or another camera, to survey a site, stopping frequently to photograph each species you encounter. If using a phone or tablet, be sure to enable autolocate to allow your photos to be georeferenced. Some cameras will do this too but if your photos aren’t georeferenced automatically you’ll have to go in and manually pinpoint the location in iNat.
later at home or in the office…
Ok, let’s say you’ve been out for a few hours photographing species in a prairie remnant. Now, later in the evening you’re sitting in your recliner ready to upload your observations to iNaturalist using your laptop. What do you do?
Step 1. Log in to your iNaturalist account. Look for the green “Upload” button in upper right and click it.

Step 2. You’ll now see a page asking you to drag & drop your photos.

Step 3. Now, you are ready to drag the photos from your camera, tablet, or smartphone or already on your computer and perform what is known as a “batch upload” to iNaturalist.
Select the photos you wish to upload and drag & drop them onto the page above. As you do, the page above will begin to look like that one at bottom right.
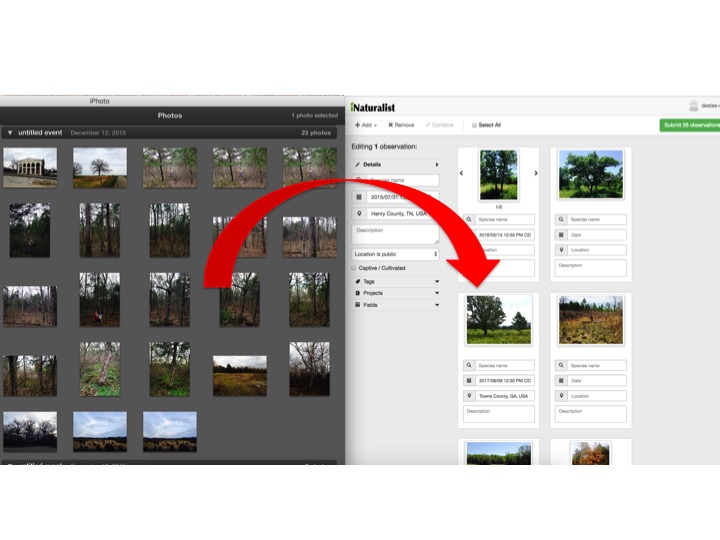
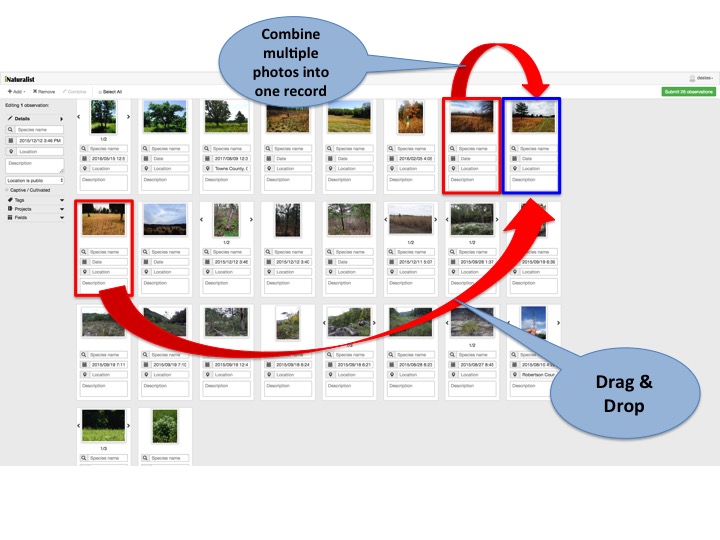
Step 4. Once you are done dragging your photos into iNaturalist, you may realize that some of them need to be combined.
In the example below the three photos bounded by colored boxes represent different photos from the same observation. Rather than upload these as separate observations, it is best to combine them into one observation that has multiple photos to show variation. Of the three, select the one you want as the primary one to represent the set, then drag the other two (in red boxes) onto the one blue box. This will merge the three into one observation with 3 photos.
Step 5. Add species and location records.
This zoomed image below shows four of the records to be uploaded. Notice under the first photo you see “1/3”. This means there are 3 photos as part of this observation. Below that are four fields. One for species name, one for the date and time stamp, one for location, and one for description. In most cases, smartphones, tablets, and some cameras automatically record the date and time and longitude/latitude coordinates. Some don’t however. Notice that all four records have dates and times that autofilled; however, only the last record has locality data that automatically uploaded. This means that you now need to fill out species name for all records and location for the first three records. If you wish to add notes, then these go in the Description field.

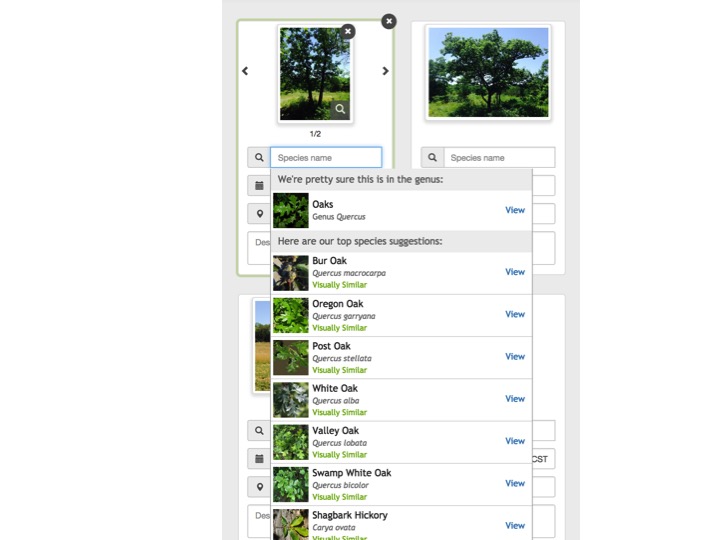
Step 6. Filling in the species name in a batch upload.
Just click inside the “Species name” box and your iNaturalist’s algorithms should begin to attempt to identify your photo based on the default image you select as your #1 or primary photo. In this case, it correctly identifies the tree silhouette as “Oaks” and below the genus it recommends the top 10 species it might be. Unfortunately iNaturalist does not use geographic location in its algorithm because Western U.S. species such as Oregon Oak and Valley Oak are listed as possible top choices. The correct answer in this case is Post Oak which is the third choice. If you know what it is, then great, you don’t have to wait for iNaturalist. But if you don’t know what kind of tree it is, no worries. If you are confident in the genus only, then just select “Oaks” but if you don’t know the species then don’t try to force it. If you aren’t confident that is an oak and have no clue what it is, then you can leave it blank. The beauty of iNaturalist is that there is a whole community of experts out there who will often chime right in and help you identify it, assuming your photos are good quality.
Step 7. Filling in location information.
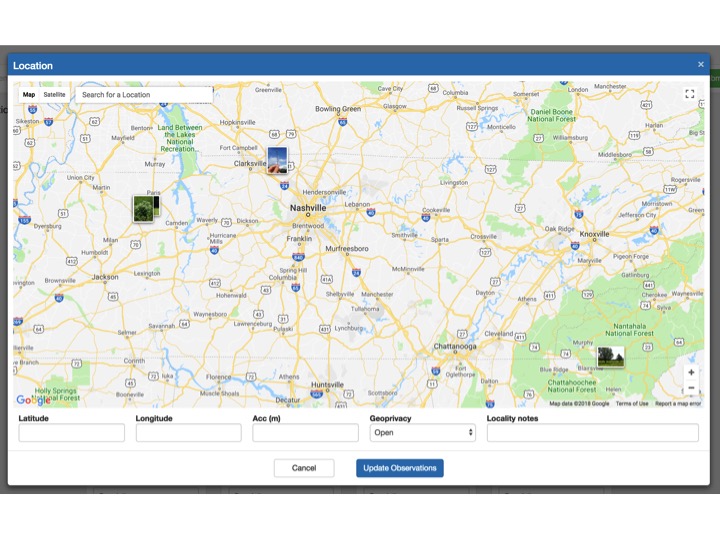
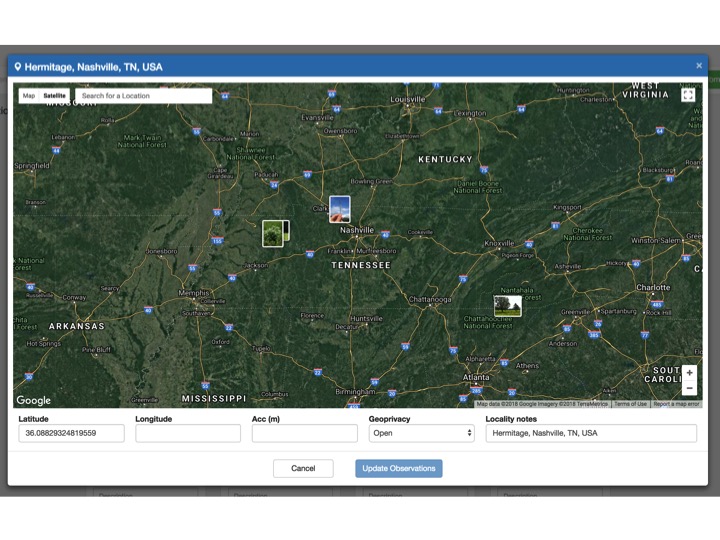
Now to fill in the location field for those observations that did not autofill, you will need to tell iNaturalist where you found it. This requires that you know how to read a map and that you can pinpoint on a map the place where you observed your record. First, look back up at Step 5 (above) and click inside the field labeled “Location.”
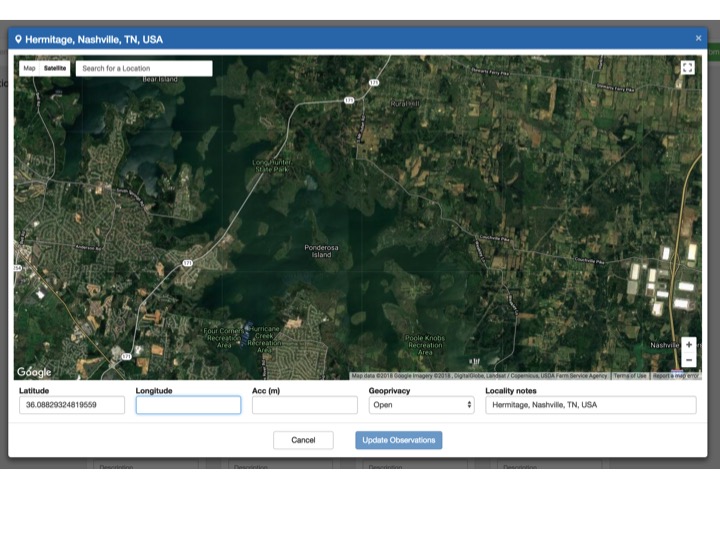
When you do, you will see a map that shows a broad area. Some of your other records that you are attempting to batch upload that have longitude/latitude coordinates become visible and you’ll see icons of their photos. For a record without locality data, you’ll need to be able to find where you observed and begin to zoom in. The slideshow below shows how you might progressively zoom in on an area southeast of Nashville.
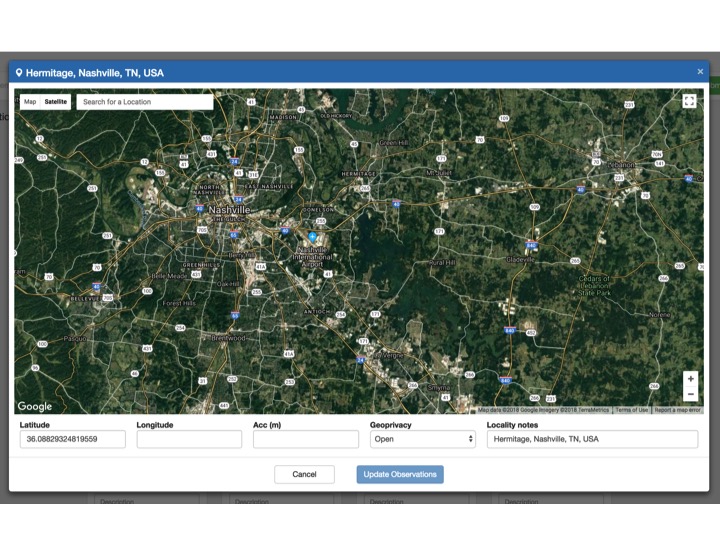
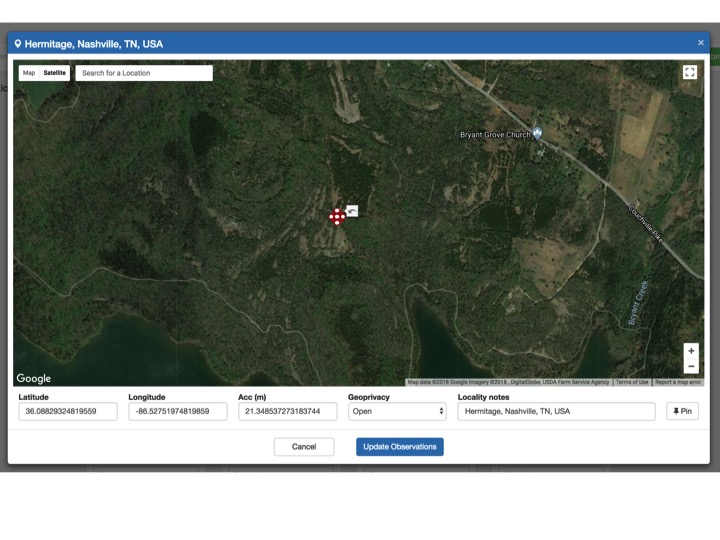
As you zoom in, hopefully you can identify where you observed your record. Click on the map at the spot where you are pretty sure you made your observation. See the red circle on the figure below. The size of the circle indicates the accuracy of the record. The smaller the red circle, the more confident you are of the exact location. In the first photo below, look below the map and you’ll see a field labeled “Acc (m)” which means “accuracy in meters.” This circle has a radius of 21 meters meaning that you are sure your observation was made somewhere in that circle. If you think you can map it even more accurately, then make your circle smaller.
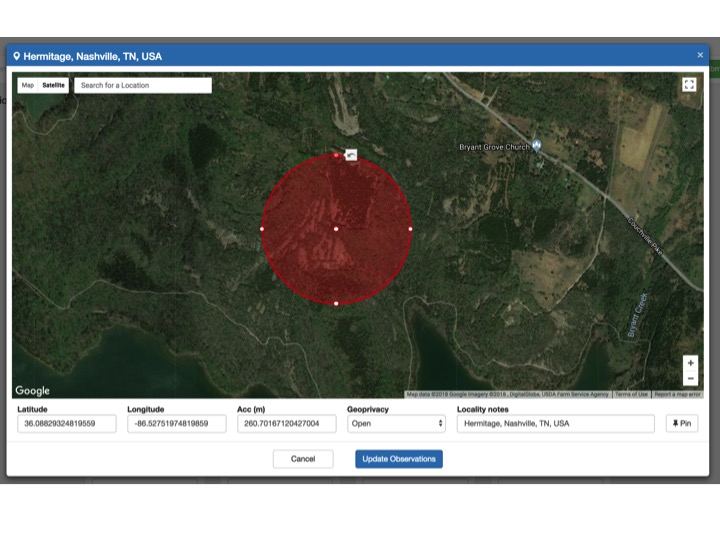
But if you just aren’t sure of where exactly you observed it, then make your circle larger. This large circle below has an accuracy of 280 meters. Ideally, you don’t want to get in the habit of not being able to relocate your observations. If you realize your camera will not automatically collect coordinates, then be sure and keep accurate notes so you can find your location on a map later when you’re doing your batch uploads.
Step 8. What if I don’t want the public to see the exact location of my observation?
There are times when you will want to obscure your locality data or make it private. If you observed a threatened or endangered species, then you probably should consider obscuring your observation. This is particularly true of charismatic species that are prone to being poached. For example, pitcher plants and Venus flytraps are often illegally collected. By posting a location on iNaturalist, people can learn the location of these sensitive species. It is probably best to obscure the record. If there are species that often are associated with endangered species, these can often serve as flags or indicator species. To some people, they will know that if they can’t see your record of an endangered pitcher plant, but they can see your unobscured record of a species that isn’t rare but commonly grows with pitcher plant then they can probably guess where you found the pitcher plant. In such cases you may want to obscure all the records found with the endangered species if you are unsure.
At the bottom of the map below you’ll see a box for “Geoprivacy”. If you click in it you’ll see three options, “open, obscured, and private.” Click “Obscured” for cases like those discussed above. Click here on iNaturalist’s help age to learn how to adjust privacy settings and get answers to more questions: https://www.inaturalist.org/pages/help.

The map below is an actual map of showing a mapped record of the federally-endangered Green Pitcher Plant (Sarracenia oreophila) in northern Georgia. The rectangle below represents one US Geological Survey topographic quadrangle. The green dot within the rectangle ordinarily would be the location of the actual observation, but in this case since the record is obscured, then iNaturalist randomly assigns the location within the quad. Therefore, the green dot you see is not the actual location of the observation. That information is only known to the person who observed it.

When we explore iNaturalist, we can see that a different person made another observation of Green Pitcher Plant from the same region. I happen to know they were observed at the same site on the same day. One person “Obscured” the record (above) but the other person made their record “Private” (below). This means that no information is available. In both cases if you want to know more about the records, then you need to contact the people who made the observations.

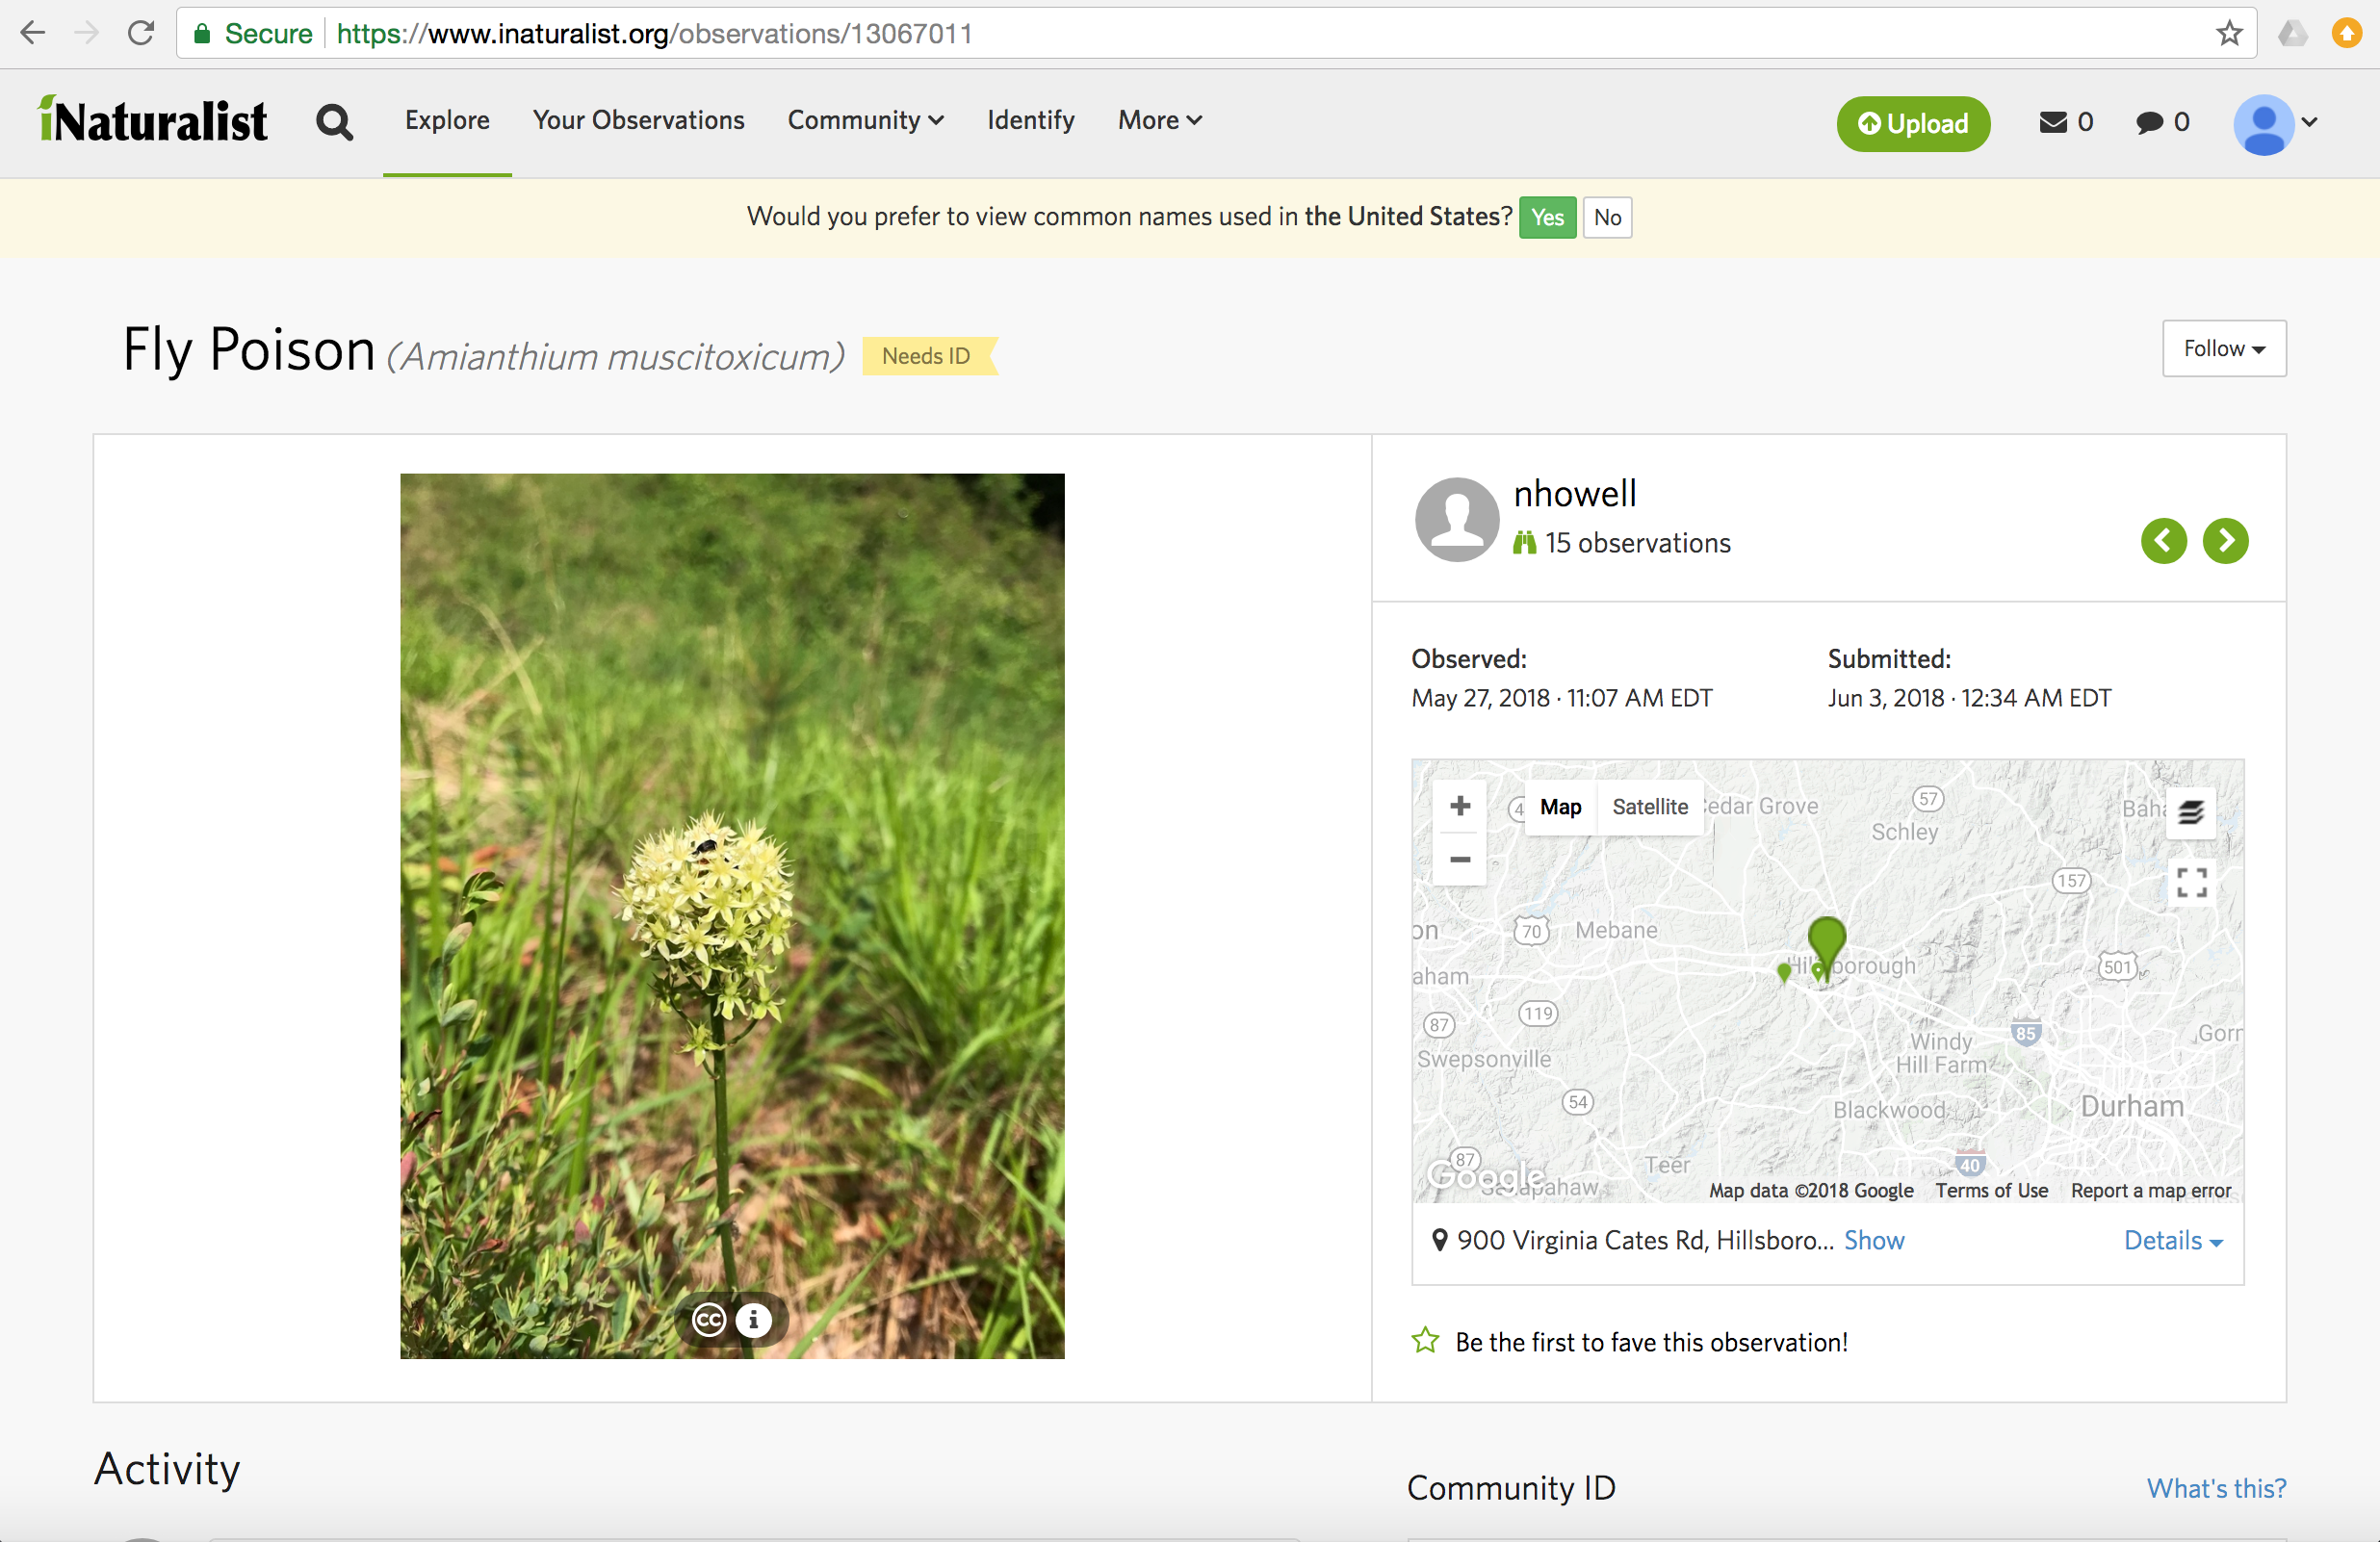
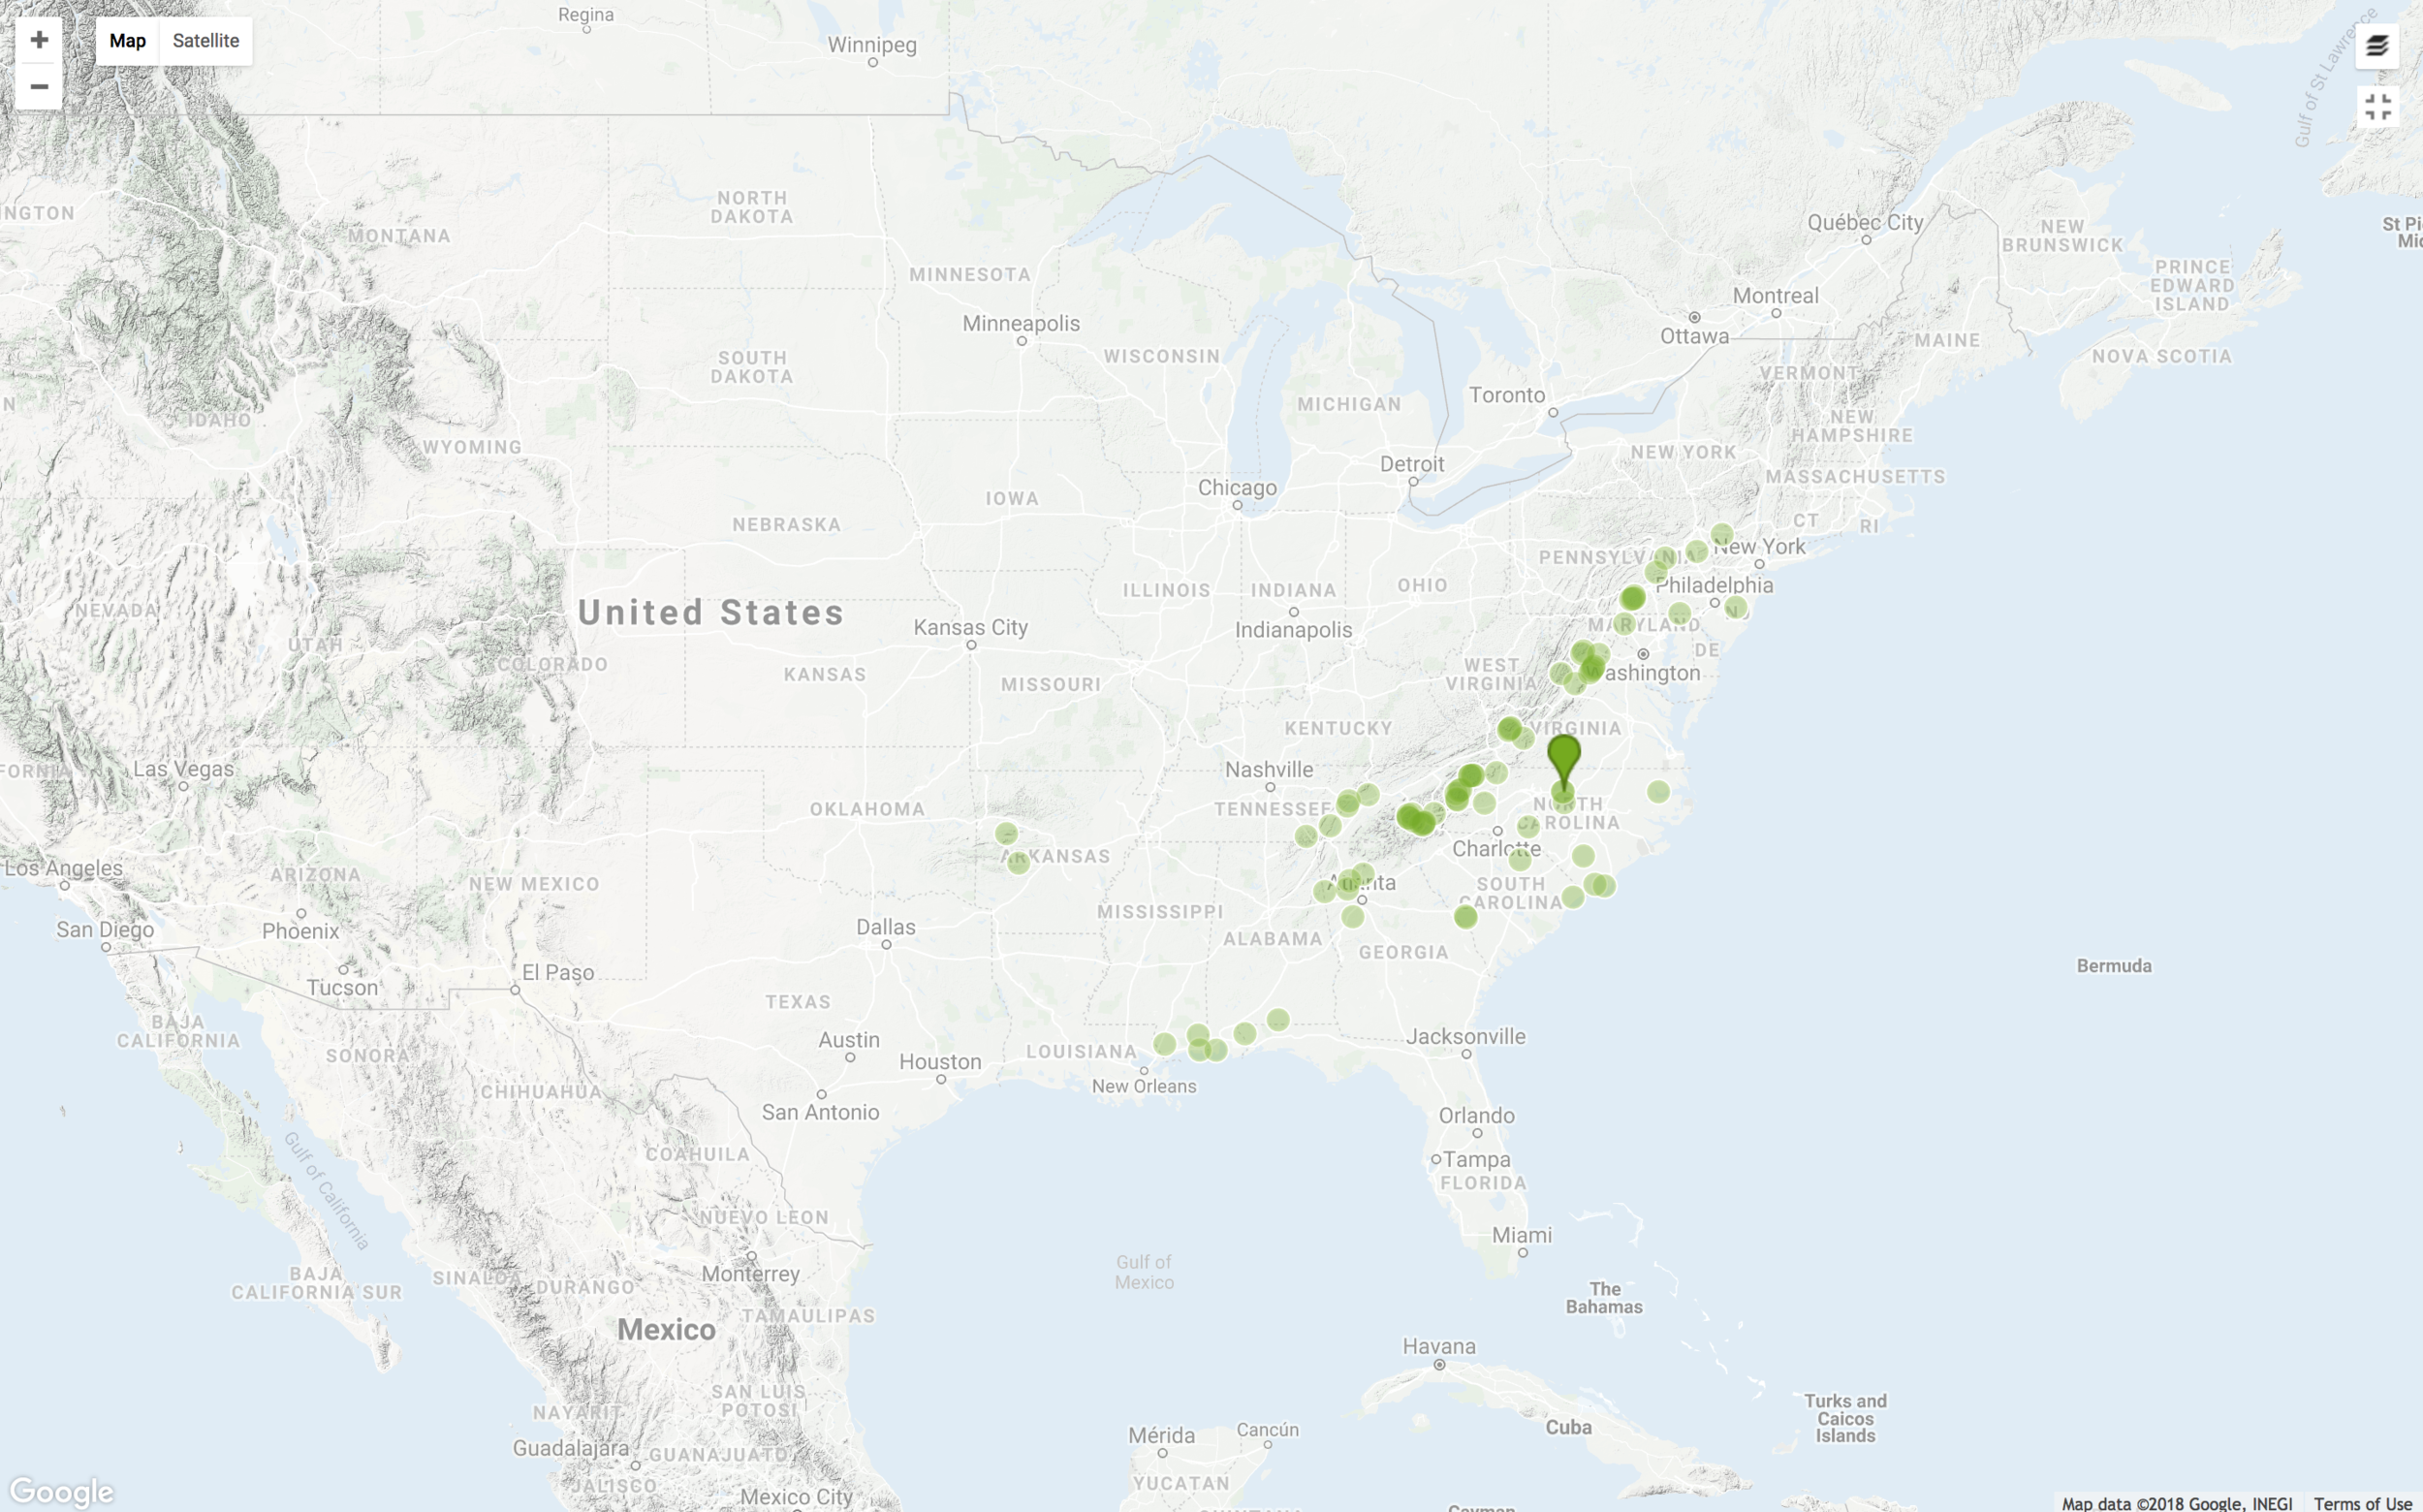
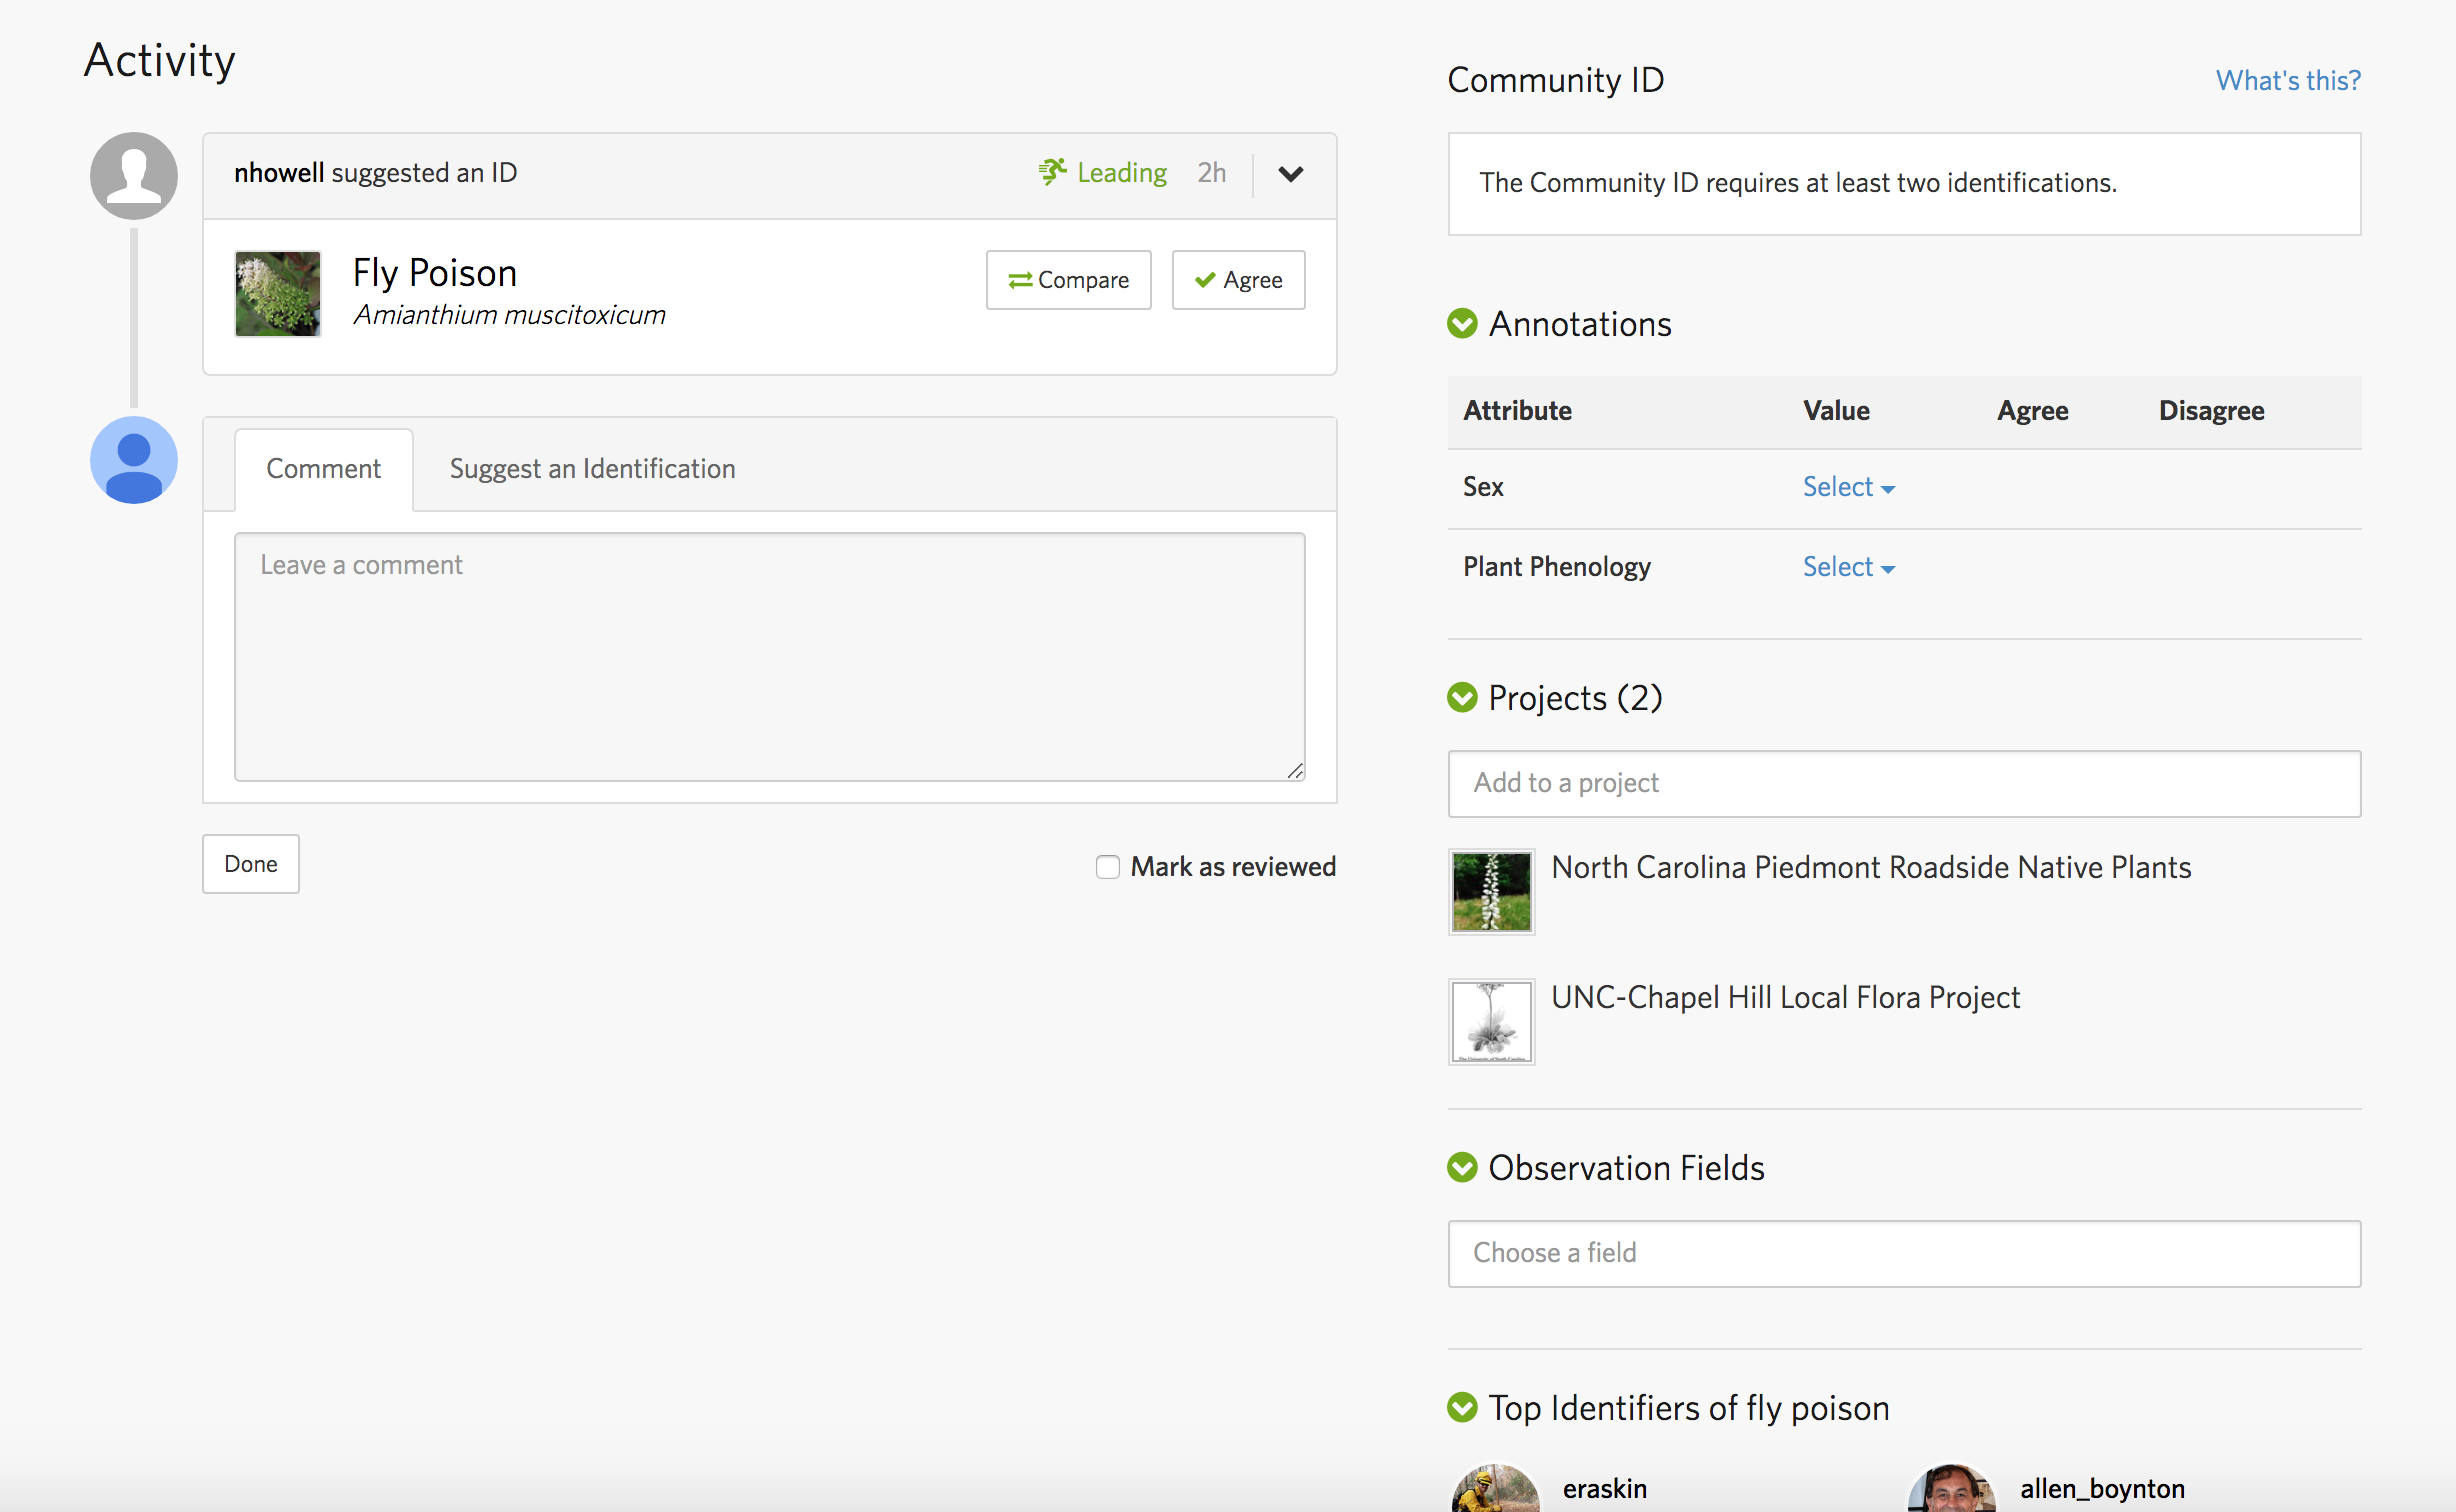
Reviewing Your Observations

For example, if you click on the name or photo of Fly Poison on the right side of the above image, then the profile page for that species comes up. You can click on the map and zoom in and out to see all of the observations for this species throughout its range. Scroll down and you will see a place where others can comment on your record. For example, if you photographed and didn't know what to call it, then likely someone from the scientific community will be able to provide an answer or at least point you in the right direction.